
Good Afternoon everyone!
It's been a while since I built an MG kit out of the box that's why it took a while to make this post. It's a kit that has a special place in my heart because it's my top most favorite series in Gundam Universe.
I love the Universal Century for how close it is to our timeline and the realistic aspects it has in the battlefield.
This particular mobile suit comes from a time during the One Year War. While Amuro and the gang in the White base are busy doing their stuff in space, these group is dealing with another issue back on earth.
I'm talking about the 08th MS Team, a ground team that carries out skirmishes and gathering intel for the Fedaration.
This team is headed by Shiro Amada, one of the most underrated pilots in my opinion. He's not a Newtype like Amuro but he does have natural talents to carry out their missions effectively.
I got this kit from one of my go to stores, Wasabi Toys, they have a lot of kits for a fair price so do check out their site if you wanna avail good prices! Membership is free so go now!
This kit is my comeback kit to the gunpla scene. I've been away for almost 3 years and I don't know what kit to get actually. Then I saw this kit in the shelves.. Just waiting there.
Boxart:


It's an old kit, dating back to the early 2000's but still, if you love the show, you won't hesitate on getting this MS. Box art shows a realistic picture of the MS, some details and gimmicks of the kit on the side.
Contents:

This is what I like about the old school MG kits, they give this cardboard insert of the kit showing what it looks like. Love the simplicity of this kit.


MG kits usually comes with Foil sticker, clear stickers and Dry transfer decals. Dry Transfer decals stick easily so make sure to keep that white paper to prevent it from being ruined.
Clear stickers are nice additions to the kit giving them a more mechanical look.

Comes with a mini Shiro Amada Figure that needs to be painted, the only other kits I know that has this are kits from the G-Gundam series. It has nice details and seems easy enough to paint. I didn't bother with it and it's still connected to its tree haha!

This kit also includes screws, mainly for the arms to support the poseability. Last time I encountered this is from my MG 1/100 Aile Strike (1st ver.) They're quite small so be careful no to loose them!


Most pieces are molded in color for an MG kit but some small details might still need some lining and painting but it's a case to case basis. The shades of colors used closely resembles what the Ez-8 should look like.

You get a clear piece for the eyes, you can paint this if you like to get that glass look if you don't prefer stickers :D
Manual:


MG manuals are big like a small magazine. Old kits, have this kind of design, where the name of the MS is just written across with their corresponding affiliation logo. Master Grades really give you that engineer vibe because of how detailed these scales are.
At the back we see the opposite picture of the cardboard insert showing the back side of the MS this time.


Next couple of pages shows more mechanical details and information about the Ez-8. Also shows the runner count, it's not much since it's a basic ground type mobile suit.

Middle page shows a color page with the kit made professionally along with a color guide. Also shows some highlights from the show with some information.


This is what I'm talking about, they give you all the tiny details on the MS inner frame, it's mechanics and engineering.

Last page shows a decal/sticker guide. Decals tend to go to certain place like the "08" on the shield, some stickers are suggested to place on a certain area but it's up to you how you want to arrange them.
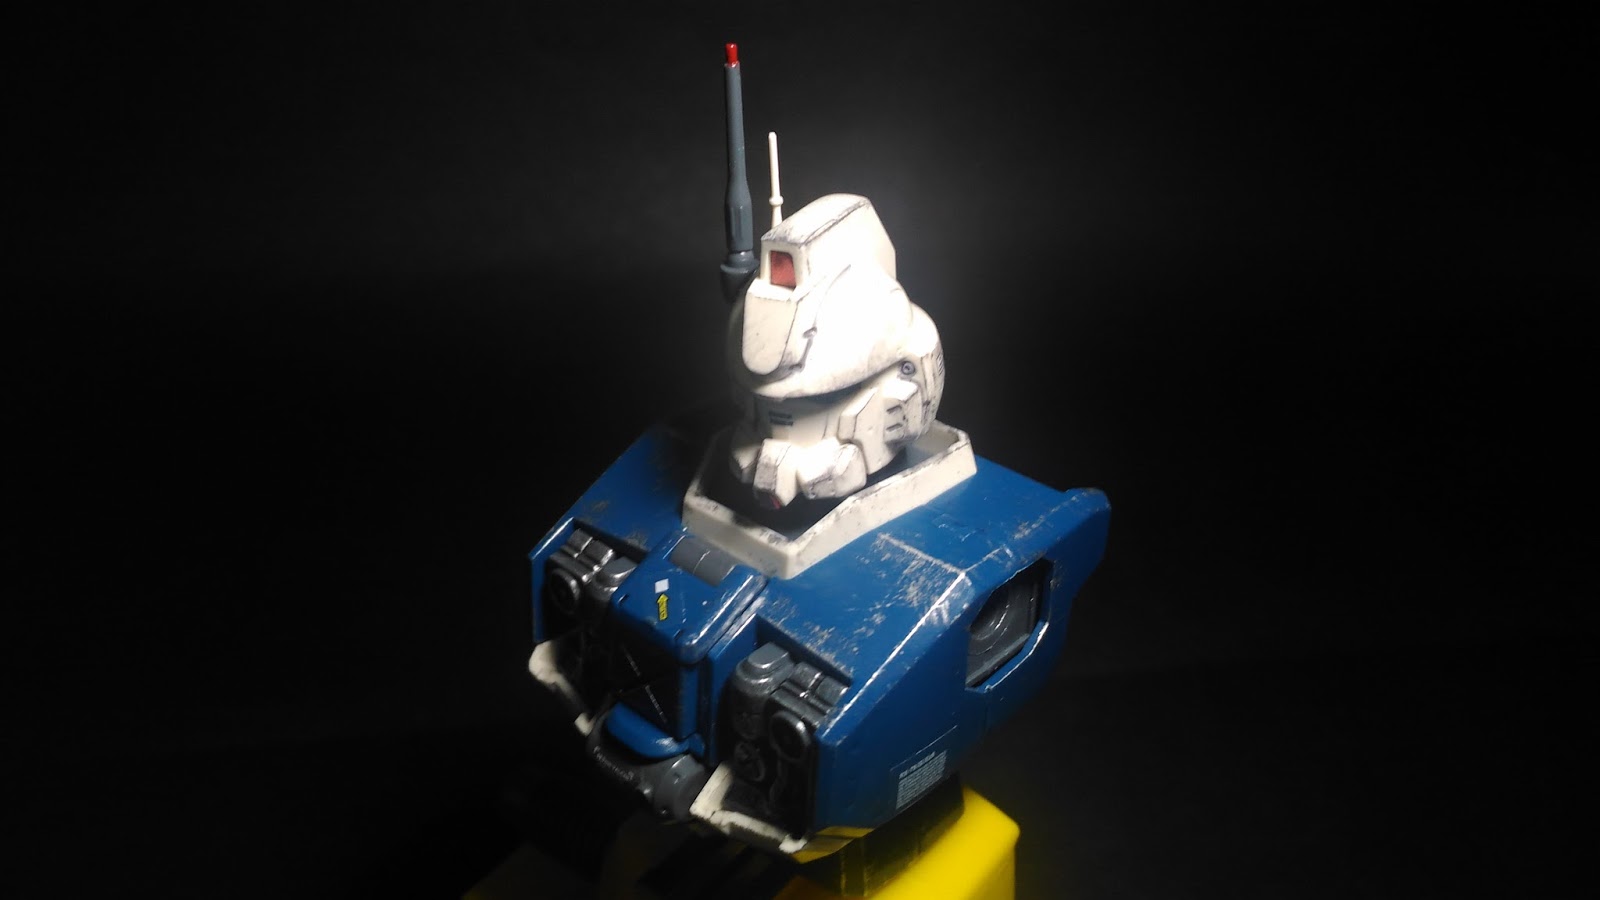
Head Assembly:


The head usually has a lot of small pieces to work with and some tend to be fragile so be careful when connecting pieces.
Also, first time I used sand paper to remove nub marks. I usually just trim it with my hobby knife but I need to level up since this MS is my fave.


Most of the foil stickers will be on the head. I used the eyes and cameras. For the tip of the antenna and the chin, I painted it red . The chin does come with a sticker but time will tell how long that will hold.
I recommend gluing that smaller white antenna because it tends to fall a lot. It doesn't have a secure connection and it will just frustrate you. The manual even recommends to glue it.
Inner torso:


Inner torso is pretty easy to assemble. I was still struggling with sanding at this point because I didn't realize I needed higher grits. LOL.
Inner Waist:


The mechanism that makes it possible for the kit to do a kneeling pose. It was a big deal back then when a kit can kneel properly, it means the kit is very poseable at the time.

Slowly getting there :D
Inner Leg/Feet:


The feet had a lot of assembly to deal with. It's mostly for the open hatches and moving parts when it bends. Take care of the small and thin pieces :D


Without the armor, it can easily do kneeling poses. Also, the feet is built into the leg and not the usual ball joint or peg that you plug in. Once you connect it you need to disassemble the entire leg again if you want to take it out. Sadly, there's no toe joint.
Feet armor:


I did this section next because he can't stand properly. Also, the feet has those moving pistons in the front to simulate actual mechanical parts.

By this time, I bought a nail buffer because the outputs I found online really convinced me to try it. After sanding, it makes the part shine and smooth. It's one of those nail buffer you usually see in salons.

"Master has presented me shoes!"
Inner Arm:


The arm had fewer parts compared to the legs. You will need a small tip screwdriver to do it with ease. Each arm has screw on the shoulder and elbow joint. You get the old trigger finger and thumb articulated hand and they also give you fixed open and close fists. Problem is, there's no pegs to hold the weapons securely.


With that arm, he seem to be "All right" now. :D
Let's do some posing without the armor first:


With no armor restrictions, he can do a lot of movements freely with ease. I love inner frames, I really wish focused on MG kits earlier haha!
With the inner frame done, let's connect the armor pieces!
Torso armor:


Hmmm... I must apologize... It happened again, the file for the armor assembly disappeared! D: I only have pictures of it connected already @_@
Anyway, it's mostly 2 pieces for the main body. The front however had a few parts for the open hatch gimmick. Also, take care of those small pegs in the chest piece, they're secure but with the size, it might get lost easily.
I love the mechanical detail that they included here, you can see the fans and tanks and what not. The hatch mostly connects by friction so you can pull it out anytime.
I also painted the inside just to make it more mechanical looking.
The cockpit hatch is just a small door with a bar joint to flip up to open.
Waist armor:


Just like with the torso, its mainly slapping the pieces onto the inner frame. Also, the skirts have a separate picture because the manual indicated them in the weapons section because it's where the ammo clips of the gun is stored.
A bit of lining is needed to bring out some details. Gray looks better and subtle with white parts. Black tends to look heavy for me.
Leg armor:


With armor on, it tends to hamper the articulation already. You can see now all those leg mechanics in motion now, movie pieces are cool, but don't overdo it.

Slowly getting bulky now :D
Arm armor:

Not too much also, you just slide most of it in.


With the armor on, you can still get some nice bends. Just a bit of lining and you're done.
Complete assembly:


An out of the box (OOTB) build still makes this kit look awesome! He's fairly plain and he doesn't really sort the traditional lead Gundam colors. If you watched the show, the MS prior the Ez-8, the RX-79 [G] has the more recognizable Gundam look but it got badly damaged in a fight.
The team managed to make some repairs with the materials the have. Most of the main body is retained, it just the outer layers and face that changed a bit.
Articulation:

With the armor on, you can still do the kneeling pose thanks to that unique thigh joints to swivel the legs to make it look natural. Arms are on a ball joint and can move to certain positions. The head waist just rotates but not fully 360 because it hits some armor.

The kit has nice balance. It's doesn't have much to weigh it down anyway. The leg can go forward easily but it can't move back because the back skirts are fixed.

This is the maximum splits it can do. It's not amazing but it's enough do ground poses well.
Accessories:


Pretty easy to assemble, just take not of the positioning of the smaller pieces and the alignments. It opens up and closes easily and they extend to accommodate another accessory.

*Cues in Dora the Explorer song*
Shield:


Pretty straightforward assembly. One of the smallest shields ever for an MS. It's amazing how this thing can take a lot before breaking. It has a peg connector that can move to move it further to cover the hand to maybe use as a melee weapon.
Beam sabers:


Basic beam sabers that comes with beam effect parts that are angle a bit to simulate a slashing motion. They plug into the sides of the calves. Make sure the storage unit is plugged well and angled because you might encounter an issue where the beam saber won't fit properly.
It happened to me the first time and most people encounter it thinking it's an issue of the kit. It's mostly making sure the part is plugged in an angle.
Machine gun:

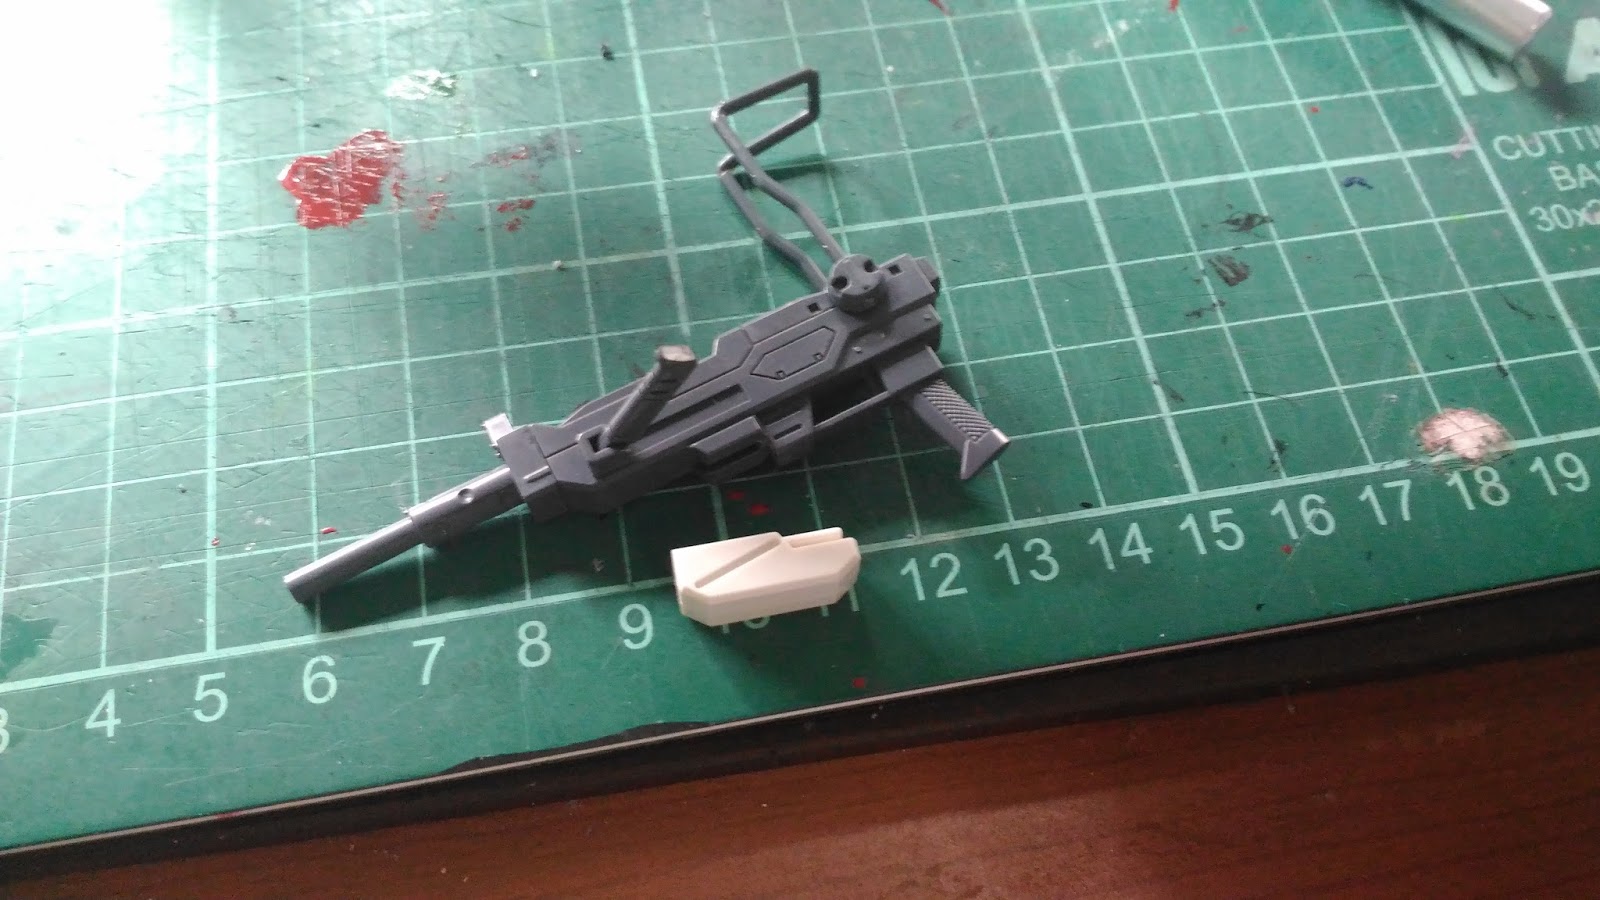
A basic machine gun, has a moving stock and removable clip like the ones in the side skirts. Also has a moving handle but I had hard time posing the kit holding it.
Beam rifle:


Simple assembly but one tiny details off. The body needs to be white haha! I don't know why they can't squeeze in that small detail. I didn't bother with it since I'm not gonna display the kit with it. He barely even used this in the show, They also give you a sticker for the scope.
Backpack pt.2:


Easy to assemble, just don't loose those tiny pieces for the doors. In this piece, I tried weathering the interior. I'll talk more about the weathering later.


It's basically a box to hold a weapon and the MS can carry out along with them just like any other soldier in the battlefield :D
Hyper Bazooka:


A cool gimmick where the Bazooka can be separated into pieces.


The pieces go in a certain position when storing them but the overlook is awesome. Lot's of posing options with this guy.
Complete sortie:


Here's out little camper ready for his adventure in the woods! My only other grip is how the waist tends to flop because of the backpack. It doesn't completely tip him over but it tends to make a gap between the torso and the waist. With proper body and leg alignments, you can avoid this to an extent.

You get a few leftover parts here, some are carried over from the RX-79 [G].
He looks rather plain right? So let's add some decals to enhance his appearance:


Some small details can really increase the visual appeal of the kit. I removed the sticker in the cockpit hatch because it doesn't stay well and looks out of place.
The "08" in the shield is pretty much the most important decal for this kit because it literally completes his look. For the other, I decided to add them just to add some visuals.
Posing:


I tried doing some poses in the show and I managed to pull them off quite closely. Since there are no pegs for the weapons to be held properly, I use sticky tack to keep them in place for the purpose of taking pics :D


For the beam rifle, it's easy to hold the extra handle because of its body length compared to the shorter machine gun.

Final shot?


With it's great balance, I easily pulled of pre-running poses without falling down. You just need to angle each leg properly.

Pilot is from my MG 1/100 Gundam RX-179 MK.II Titans. Pilot hatch is really small haha!

Close up.

Thanks to the bazookas moving shoulder rest, you can easily position it for posing. Also, the shield can be clipped on to the knee armor.. Not sure if they actually did that but I saw it in another review haha!

Always, keep you toys after using them.


If you run out of bullets, you can always rely on your trusty beam saber.
If that fails...


That's one way of fighting haha! Pretty much the most iconic scene in the show where Shiro is cornered and forced to think on how he can survive the fight. Also, his love for Aina deeply ignited his spirit.


A wild cargo appears!

"You wanna buy something? PM sent." Lol.

You also get a mini standing Shiro figure. This old pilots are hard to stand because of how stubby theres feet are. Recent release have a platform molded for them.
What else? Well, if you've watched with the show, you know that they mostly traverse different terrains that usually leaves their MS very dirty and worn out. Just like the show, I decided to weather this kit!
A kit like this demands to be weathered, up to you how heavy you would do it.
Weathering:

I literally bought stuff just for this kit. Since it's my fave MS I really want to give it justice. I started with the Tamiya weathering set A because it has Sand, light sand and mud textures.
A good flat brush is also recommended for doing the dry brushing technique. I'm still new to this so I'm still learning as well. :D


I mostly dry brushed chrome silver into the dark parts because they stand out more and it looks like metal scratches. I learned that you shouldn't over do it to make it look realistic unless you really want to do some heavy weathering then enjoy by all means haha!


For the white parts, I mainly dry brushed German grey because the shade fits well and it looks like ash and paint chips.
Complete body:


Aside from the dry brushing, I also applied the Tamiya weathering kit as well. It's like a makeup kit a double ended applicator. One is a brush and the other is like a sponge to rub into the pieces.
I just used the mud heavily on the legs and feet but I think it needed more hahha! Some sand tones on the rest of the body as well.
I didn't want to over do it because it might look like crap but I like the outcome though. Now let's pose him again!
Poses pt.2:


The weathering effect really made it more visually awesome! It's a kit that really need it to maximize its aesthetics.
Even with simple poses he looks really worn out and went through a lot.
Comparisons:

He's almost the same height as the Grand Daddy Gundam but still stands taller than the Crossbones X-1.
He looks really bulky and more militaristic maybe because of the weathering and the overall design of the MS. Since he doesn't have the traditional Gundam colors, he tends to look like a grunt suit though haha!
I also included a common HG and SD kit as well to give you an idea how big this kit generally is :D
For the MG 1/100 RX-78-2 ver. 2.0 review click here:
For the HG 1/144 RX-78-2 review click here:
For the SD RX-78-2 review click here:
For the MG 1/100 Crossbones X-1 Gundam review click here:
Verdict:
Details/Gimmicks 10/10:
Despite being an old kit, it still shows a lot of mechanical details thanks to its inner frame. Simple mechanics like the pistons in the feet add visual appeal to this kit. Not much lining but it has in places that needs it to break the monotonous color.
The backpack and cargo has a lot of nice details especially the cargo containers interior. It really looks like an actual cargo for storing equipment.
Another neat gimmick is the opening hatch in the chest. It's like mandatory feature because it's present in the show. If that was omitted that might impact the value of the kit.
Too bad he can't store his other guns but the storage unit for the beam sabers in the calves is also a nice feature, you just need to assemble it properly to use efficiently.
Accessories 9/10:
They pretty much gave you everything he has in the show, and how you utilize them is up to you, Since it's an old kit, there are no pegs in the hands, with this in mind, posing can be a chore and frustrating if you don't know how to address. Thankfully the bazooka can be held easily because you can rest it on the shoulder for support.
For this issue, I opted to use sticky tacs so he can hold them properly and in place when I'm taking pictures. They do give you other fixed hands for added posing options.
Another main issue is how they made the beam rifle. Two extra white parts couldn't be that hard. It's weird to see in an MG kit to have solid colors when you expect it to be molded in color since it's a bigger scale.
Maybe if there's a 2.0 of this kit, they might include the parachute because those bars in shoulders are just there for nothing.
Parts 9/10:
Most pieces are molded in color, I just forgave some pieces in the head because they are indeed too small to be molded anyway. There's barely any seem lines that are too obvious since the parts works well with the panel separations with the inner frame.
There are some bad nubs especially in the darker colors but if you trim and sand it well, you can avoid causing stress marks and other unpleasant deformities.
Since most of the kit is white, it really asks to be weathered because it looks like a plastic toy if you keep it plain.
Articulation 9/10:
Solid kit over all, it's just that the waist can be a bit floppy as I said earlier. Maybe if the ball join was in a bit more deeper this can be prevented. It securely locks in place but it feels so shallow making it flop, especially when the cargo is mounted already.
Feet are very stable because of its assembly but I wish the legs were not ball jointed. It's still limited even with the thigh mechanism. It's enough I guess for posing but a peg and swivel joint might help a bit. Same goes for the feet and arms, it has nice poseability and solid build but it still feels so limitng.
I know the Ez-8 Doesn't really do over the top dynamic poses but a little more help with the articulation can be nice :D
Verdict 9/10:
It's an old kit but it still has some charms especially if you love the show. While I was building this kit, I can't help but rewatch the show just to reminisce how amazing this short OVA is.
I love this MS for its simplicity and over appeal visual appearance. It doesn't say much but you can tell that it's a piece of war machinery.
It looks good even for a straight OOTB build but come on, this kit demands to be weathered. I'm not saying you need to do over the top but with basic weathering techniques like the ones I did still makes it amazing!
Long story short, if you love the show then this kit is an instant get. Otherwise, you might not enjoy the old mechanics in this kit, most notably the hand manipulators.
There you have it! My take on the MG 1/100 Ez-8! If you like the review leave comments or share it with others.
Also, follow me on Twitter for my random ramblings:
https://twitter.com/GunMod88
and
Instgram for my BTS shot and Toy photos :
https://instagram.com/x88x
I hope you enjoyed the review!

No comments:
Post a Comment