
Hey Guys!
Sorry for the procrastinating delay of this review XD I have that habit where I purposely don't do something because once I do it, I have nothing else to do :))
So yeah, Here's the much awaited review but a little recap about this kit.
*Recap*
I got this kit loooooooong ago even before I did my internship in malaysia. It so happens that I didn't have enough time to build it so I left it untouched. I got this kit 2 days after I got my MG Force Impulse, I was suppose to get them at the same time but there some misunderstandings with the shipment of my Freedom gundam. That's why you guys saw F.I. first :D
When I got back here in the Philippines, I was suppose to build him right away but things got in the way like discovering an HG 1/144 Sazabi, my friend bought me an SD Juo Gia and mostly because of my lazyness haha!!
*End of Recap*
So......... We all know that I only like Freedom because of the design not because of Kira. Truth be told, Gundam SEED?Destiny has a lot of awesome suits, unfortunately the characters and story ruined the show.
Let's get on with the review.


Very simple box art, You can see part of the Archangel in the background. From the sides of the box you can see the gimmicks and it's main selling point: The fact that it can spread its wings while deploying the shoulder cannons is pretty much a really really really big deal since the HG, 1/100 NG and the N 1/60 can't even do it except for the RG but that came late so they incorporated that feature as well.
it's a very massive box, as expected from a SEED/Destiny kit.. they all have huge boxes for some reason.. The MG 1/100 Gundam MKII ver. 2.0 is just half of this @_@
Manual:


The old school MG manual... You just have their names across the cover with the logos from their respective shows. Also the back page shows the back shot of the MS. In newer ones, they show the MS facing front first.


Details about the suit, good for you if you can read Japanese, if not, it's not important XD The next page shows the runners you'll get and it's nice that they gave you a stand :D


The decal page, not quite a lot compared to a Ver. Ka kit... Take your time, you don't wanna ruin the good ones :D He only has Clear stickers, foil stickers and Dry transfer decals. Water slide decals are always sold separately. The middle page is always a color splash page showing various pictures and information about the MS and there's also a pint guide if you wanna paint everything.
Unboxing/Runners:

As with old MG kits dating 2004 and below, you'll get cardboard inserts with the picture of the suit. It's a good display but I need space so I just hide it with the box.

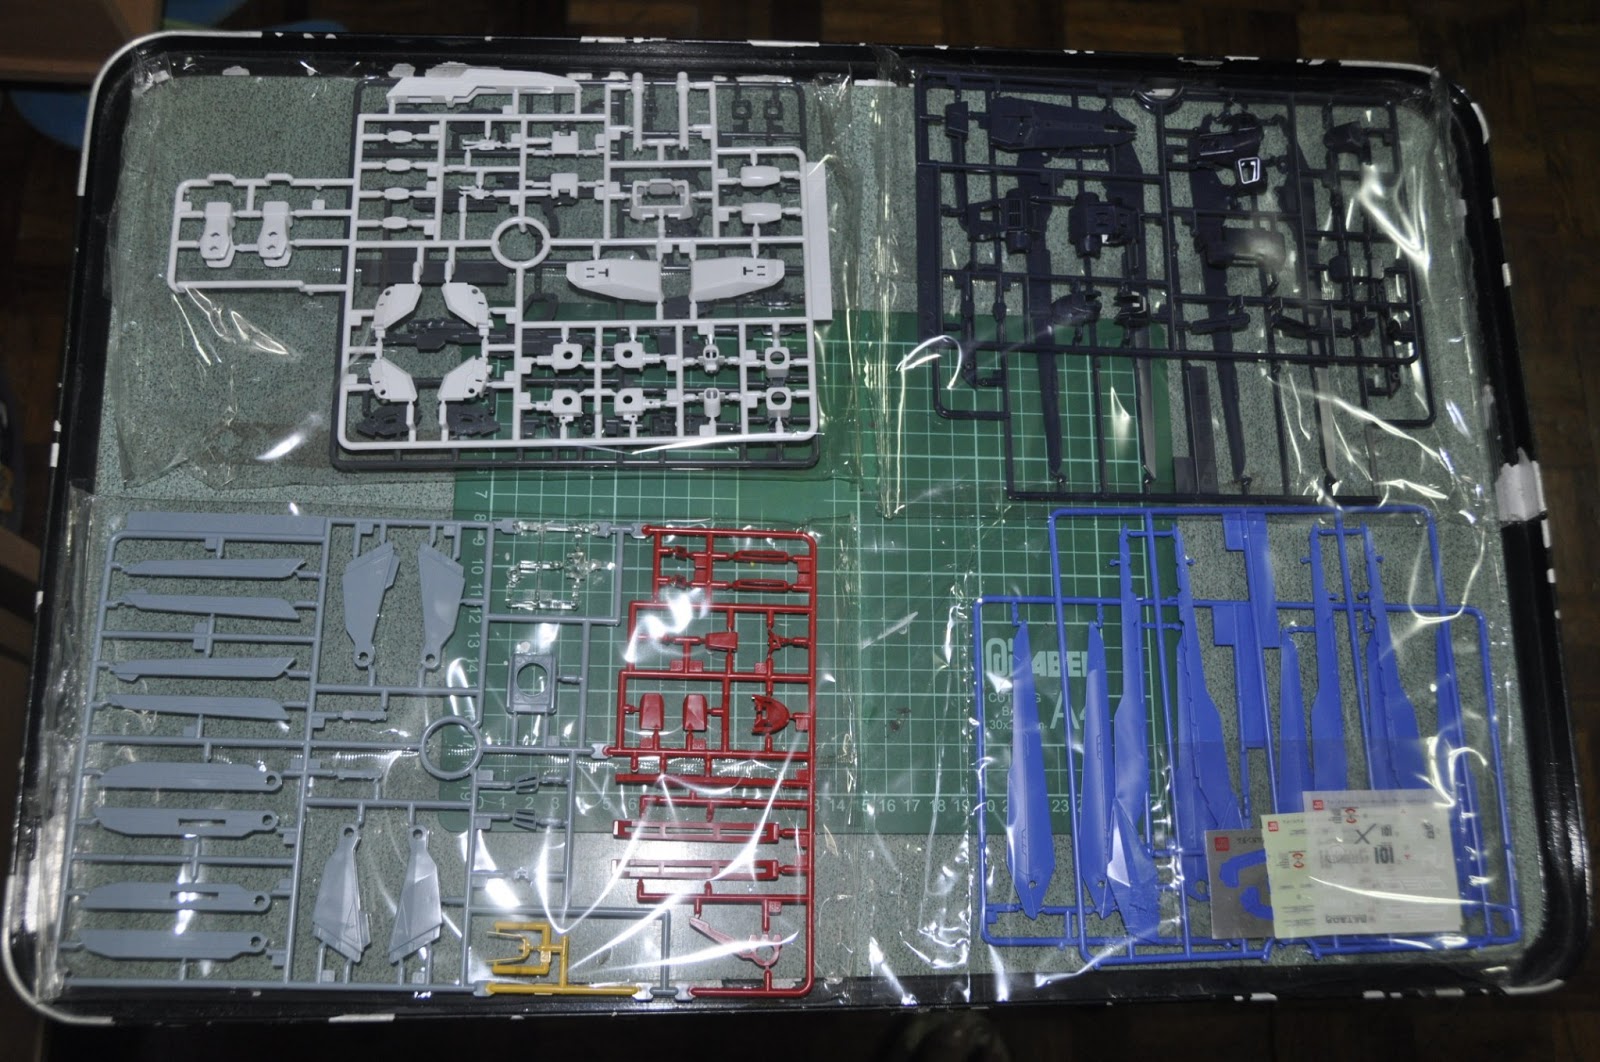
You'll get a total of 16 runners, beam sabers and stand included. It's quite a nice color separation, they have all if not most parts in their respective colors. Parts like the head vulcans are molded because it's too small so just paint those.. It's not a big deal and it's easy to do anyways.

Foil stickers include the Eyes, the wrappings around the beam saber, the front and back head camera, the triangle thing at the back pack and sadly the blue parts for the beam rifle. I disregarded the last one because I painted it instead, that lasts longer.
Clear stickers include the generic caution, warning and dangers signs accompanied with various logos and weapon names.
The Dry transfer decals includes most of the good logos so be careful not to ruin them, if you do ruin them, buy the water slide decals but why waste money XD


The stand included is pretty simple, just 2 parts you stick together... You can do a few good poses but nothing beats an actual display where you can bend some parts.
Now we covered the basics... It's time to build.
BUILDING TIME!!!
I'll build the inner frame first like what I usually do with all my MG kits.
Head:


It's an MG, expect a lot of small and fragile parts, be careful when cutting them off the runner and also when trimming them to avoid unnecessary damage. Did a bit of panel lining and painted the head vulcans gray. Aside from that, it's pretty decent itself :D
Torso Inner Frame:


Here's the torso. If you've built SEED kits before, the inner frame will be really familiar and similar since they're all from the same line. They were all derived from the Duel Gundam which is the first of all the GAT series. You get a pilot as usual but I don't paint those since you're not really gonna see them. The mechanisms are the same with all GAT suits.
Arms inner frame:


Simple assembly just follow the instructions and you'll be fine. What I love about the SEED kits is that they all have that certain stiffness that makes the parts really durable. Exception to those with really heavy back packs thus weight distribution problems can follow. Has decent articulation in this stage. The hands are the old school hands so you cannot separate them like the newer MG kits can, only the thumb and trigger finger is independent. Oh yeah, this is an old MG so there are no pegs in the hands, so be patient in making him grasp weapons :D
Waist inner frame:


Legs inner frame:

A lot of parts, careful with the polycaps and the thin ones :D I really love the bending knee mechanisms of MG kits :3

Inner frame is done, he looks like a lanky robot from a sci-fi movie haha!! But this alone shows how much progress Bandai has made throughout the years.
Time for some armor power.
ARMOR TIME!!!
Torso armor:

You get everything in color so just trim them properly to avoid discoloration :D Otherwise get ready to paint. It has some similarities with the Strike Freedom in some aspects.
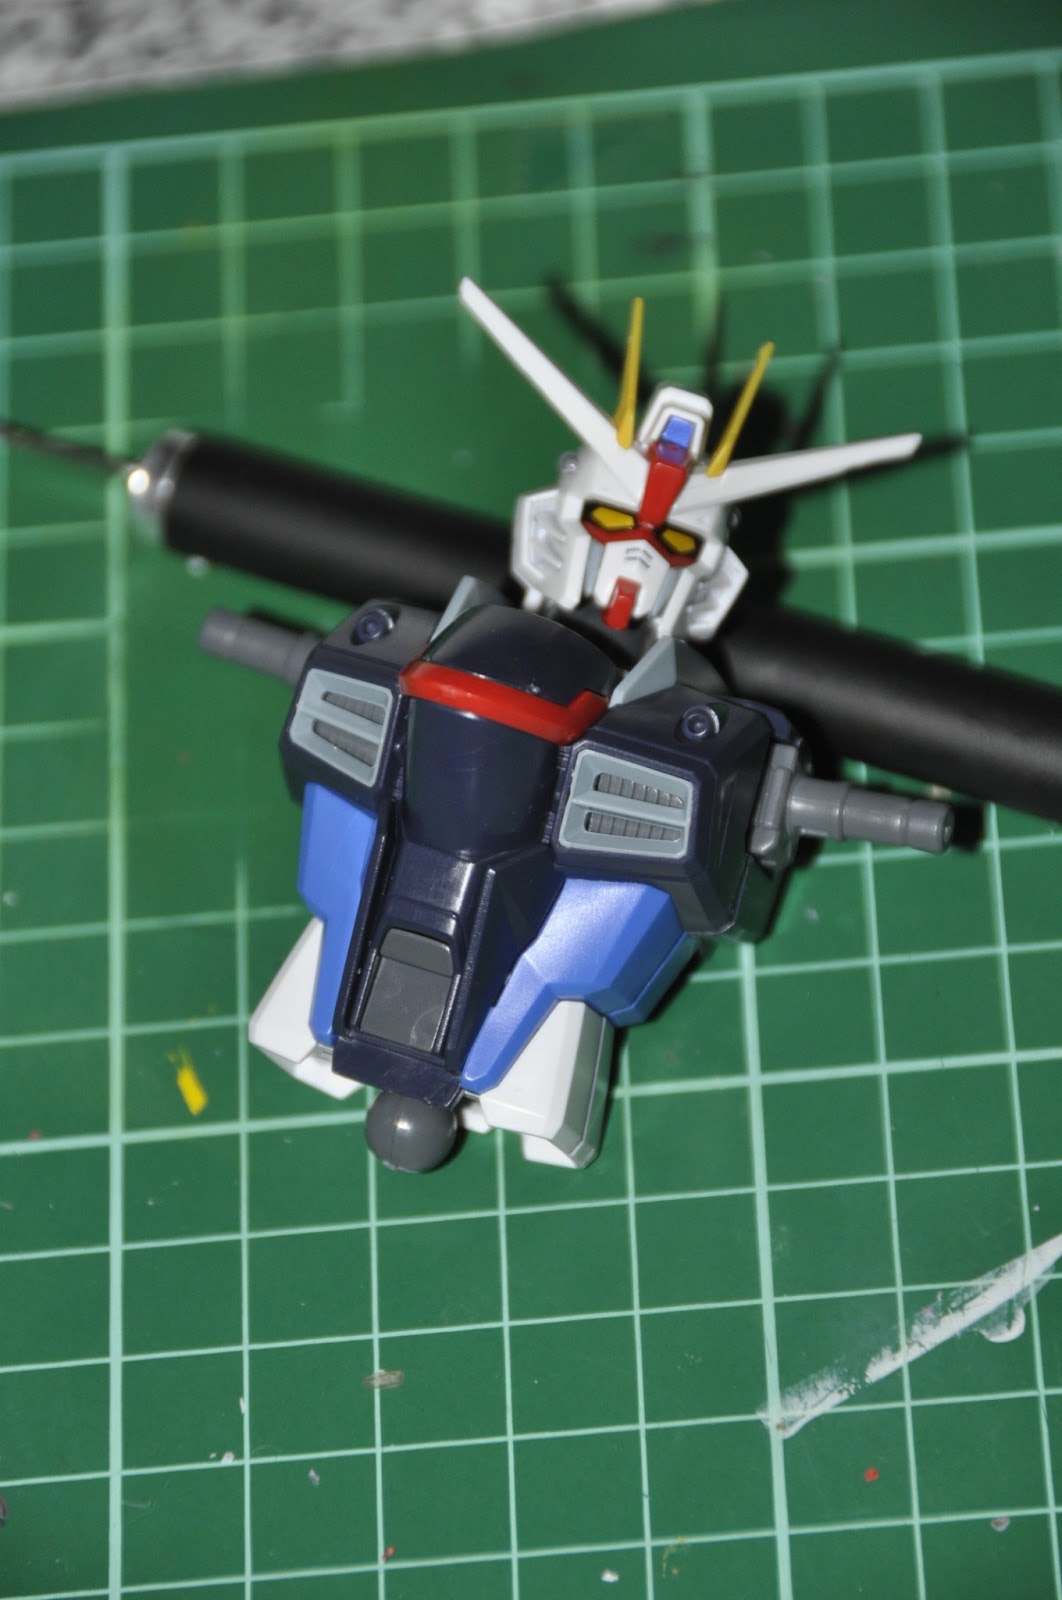
Doesn't it look like the Strike Freedom?? with slight color variations. Did some minimal lining on the lower torso.
Arms armor:


Very simple fittings, just don't force it. Did a bit of lining as well. Be careful not to loose the tiny white parts that go on the sides of the forearm. With the armor, the articulation isn't really hindered, you still have decent articulation.
Waist armor:


Very simple assembly again. Did a bit of lining. That back skirt sure is long.
Feet and Leg armor:


I guess they decided to ditch the infamous clown shoes hahaha! Simple fittings again, just make sure you're attaching the right one. Did a bit of lining. The moving thrusters are always a nice touch.
Now that the body of the MS is complete off to it's weapons.
WEAPONS TIME!!!
Rail guns:


The Freedom's Railgun is longer than the Strike Freedom.. I've always wondered why. Very simple assembly but mostly thin parts so don't force them to avoid breaking. Did a bit of panel lining as well.

Anyway.........
Shoulder cannons:

The shoulder cannons are big but only comprises of a few parts.

Did a bit of lining, make sure everything is symmetrical :D
Wings:


It's confusing at first but do it one at a time to ease the stress hahaha! My only problem is that the wings are kinda thin thus very prone to breaking in accidents. They also don't connect well maybe because the pegs are small or something. Once finished you will have a huge space to consume :D Good luck to OC people who want's things symmetrical XD That goes for me, it's quite tiring aligning everything the way you want it.
Backpack:

Only a few parts so it would really be a pain if you loose one.


I used a foil sticker here because I cannot replicate the needed detail for it. Just simple connections. They become loose from time to time due to its weight but just push it back in and everything will be solid again :D
As you can see, very space consuming in displaying and taking pictures, make sure you have a readily available space for this especially. The price that comes with SEED/Destiny kits... They consume a lot of space if you want to display them with wings out.. For me, I just fold the wings.. You can still get a pretty decent pose :D
Moving on to a robot's bread and butter. The gun and shield. I didn't include the beam sabers because they're self explanatory.. But you do get 2 beam handles accompanied with beam effect parts.
Beam rifle:


Very simple.. It's just sad that they can't squeeze in a blue part for for this. A bit of lining as well. Be careful with that clear part, it's small and hard to find XD You can also store this on the back. But it's a pretty loose fit but it's better than nothing.
Shield:


Another self explanatory assembly. You get every part in color, I really hate the HG SEED kits because they always give the shields in solid colors @_@ That's why I'm always reluctant to buy HG kits from the SEED line.. I only own an HG Destiny and Strike Noir and those 2 are the most decent in its line. Anyway, not much lining but do them if you want the extra detail.
The hole for the beam rifle can be removed and attached to the other side but I don't really see it in the show being done.
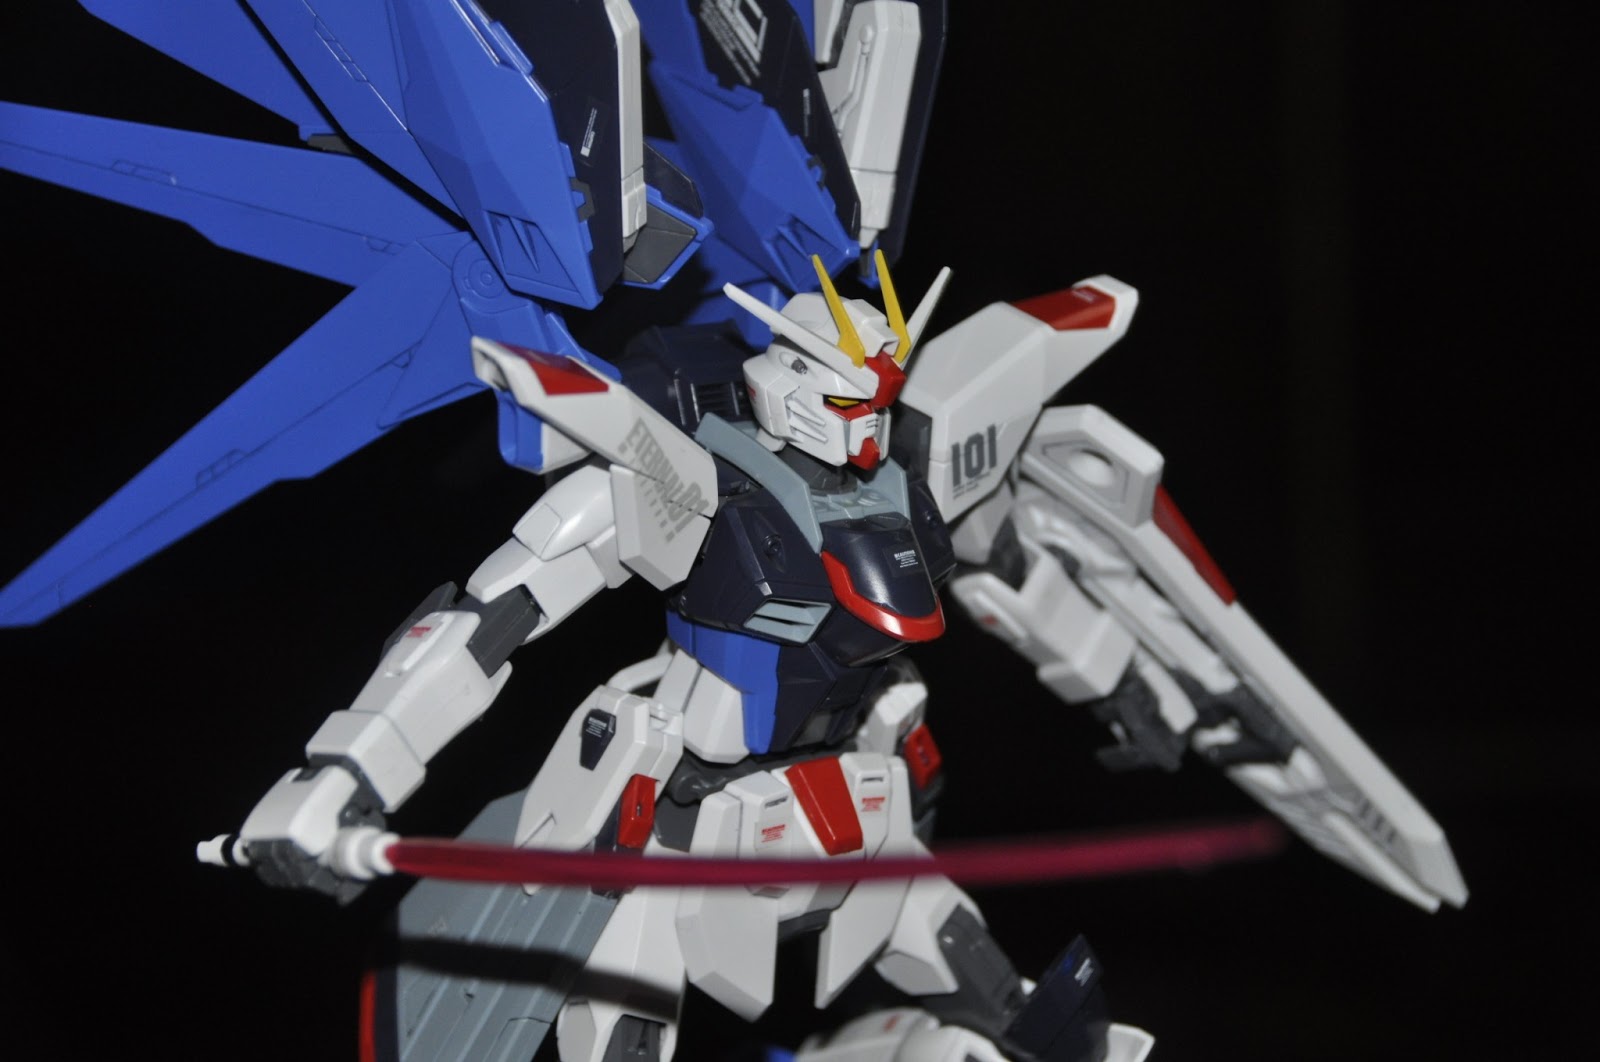
Here's a complete look of the MS:

It's looks pretty cool as is, but I still did the decals, in the next part. The wings can be heavy at times you just need to position them carefully and you can use it as a support to make the MS stand straight.

Here's the beam saber, as all with protagonist from SEED/Destiny, they can all do this double beam saber combo. They always have the time to pose and show it to the audience how awesome it is. I noticed that it's all stock footages in most episodes XD
Let's do a bit of posing before we decal him up.
POSING TIME!!! part 1


Let's just start with these 2... An open and folded version of the wings. I can't remember a time when Kira fired the guns with the wings folded.. I always see him doing it with the wings spread out..
That's why it's weird that the HG, NG 1/100 and 1/60 can't do it. Looks pretty awesome in it's all out attack.. I just wish they gave effect parts or something just to make it more dynamic but it's a model kit.. Don't expect too much.
Off to Decalizing this guy.
DECAL TIME!!!


It may be a few dry transfer but they're all good ones. The clear stickers are a lot as usual, up to you if you wanna use it all. Remember, these applications are optional, they're not really necessary so you can just leave the kit as is. For me, I love these decals because they add more detail and it gives them this realism feel to it. Think of it as their sponsors or something LOL!
But yeah, it goes well with the MS, the decals are nicely done and compliment well. For the wings... I kinda mixed them up.. You'll see later that the wing's are switched in the coming pics... Oh well, it still looks good though :D
Let's do a bit of size comparisons shall we:
COMPARISON TIME!!!

It's a tall MS standing 18m... Pretty much the same height as the MG RX-78-2 but in this case the RX-78-2 is an SD and he really looks like a toy compared to him XD

Here's the Freedom against an HG 1/144 Sazabi. It's given that the Sazabi is a huge suit, imagine the MG scale of this guy.. It's gonna be really massive.


Here's the freedom standing with his bro's. I just noticed that Kira's suits grow gradually haha! You can really see the changes and the evolution of the suit as the series progresses.
Also, I realized that all of Kira's previous suits got blown up XD How the heck does he survive explosions?!
Let's do group shots of the Kira suits.
POSING TIME!!! part 2


Here's a group shot, It's hard to squeeze them all in one shot since the other 2 suits have massive wing spans. They look really good side by side.. I just need a glass case to protect them :))
Let's do a last comparison before moving on to the Freedom's solo shots.

Here's the Freedom up against his destroyer.. I think they're the same height..
Let's make them fight >:D
POSING TIME!!! part 3


I wanna do the whole fight but I just chose the highlights like when Shin did that awesome maneuver where he separated the Force Impulse's torso for a split second to avoid the Freedom's attack.
We all know where this is going so might as well let the inevitable happen...

Here's the Freedom meeting his doom.. I really loved this episode because someone overpowered Kira XD One of the fights I keep coming back to.
Took me a while to replicate this pose.. It's quite hard aligning everything.. Mostly for the Force Impulse because that Anti-ship sword is a pain to hold.. But once you get it, take picture and move on hahaha!!
Let's pretend Freedom is ok and do some more posing XD
POSING TIME!!! part 4


Here's a standard pose, same pose on the cardboard insert. Pretty easy to do, and you can leave him like that if you're contended with it.


(Left picture) Kira will fire those shoulder cannons whenever possible.. He loves to do that upside-down shot. (Right picture) The pose that most scales can do.. It get's back heavy so distribute the weight by adjusting them properly

(Left picture) My favorite pose, it's the most badass pose I can think off. Duel wielding always look bad ass if done correctly. (Right picture) A simple pose, a "ready to attack" pose.

Those railguns have handles for the Freedom to hold.. Truth be told, I don't really remember them being there or maybe I wasn't paying attention much to kira's fighting. A semi all-out attack.

Here's the all-out attack. I need the Meteor to make it even more beam spamming... But the Meteor only has a 1/144 scale... A 1/100 scale would be ridiculously huge.. so If you want one, get a 1/144 Freedom so you can pose it with the Meteor.
Now that we've pretty much covered everything.. Time to rate this kit.
Verdict:
Detail: 10/10 - It's a Master grade and a pretty good engineered one. You'll get how it looks like in the show and the underside of the armors even have lining for even more detail. You get all if not most parts in their respective colors. Don't expect the head vulcans to be in color and other small parts because those can be easily painted anyways. The amount of lining is just right, it's pretty much smooth parts all the way so just line the ones that you want to show up.
Decals are always a good addition to make the kit more detailed.
Articulation: 10/10 - You get a good deal of articulation with this kit. Starting with the wings, you can pretty much position them anyway you like, just make sure you push them back in from time to time because it's heavy and it tends to get loose. The joints are nice, you get decent of bends for the elbows, knees and feet.. He barely even stays in the ground because this is an MS that's meant to fly. So articulation in the air is pretty much useless.
Accessories: 10/10 - You get everything the freedom has, and the fact that you can bend the shoulder cannons to show it with the wings spreading is pretty much all you need for posing. You get beam effect parts for the swords which is a must for MG's.. It sucks if they left those out. The Freedom doesn't really have much to begin with, he just spams whatever he has.
Parts: 10/10 - Good moldings, very nice connections, very stiff in some parts so be careful when moving and turning them. The hands don't pegs but it's manageable, you just need patience when having him hold the weapons especially the beam rifle. They removed the screws for the shoulders unlike the Strike but nonetheless it's still very stiff and strong. The wings can be your enemy or your friend. It's heavy but positioned properly and you can pull off amazing poses. Again, the rotation on the shoulder cannons is a big plus.
Conclusion: 10/10 - It's a truly magnificent kit for its time. I'm not saying it surpasses the Strike or Strike Freedom but he really does have his good traits. I repeat, I didn't get this guy because I like Kira, I got this mainly because the suit is designed well and the overall aesthetics pretty much got to me. If you collect only MG scales, this is a nice addition. Athrun's Infinite Justice is in my "To buy list" because I want the Strike Freedom to have a partner. If they ever release the Justice, I'm might get that too to go along with my Freedom.
Bottom line is, if you don't know what MG scale to buy, get this guy. It's also a nice kit if you're just getting into MG scales since it's assembly is pretty simple and not much skill is needed.
Hope you guy's enjoyed the review, I don't when my next review will be because I need to focus on my career first so I can start earning cash so I can have more funds for this expensive hobby of mine :D
One more thing... I've always wondered how the creators came up with Strike Freedom...
Here's a theory:

It's possible if you think about it...
They're so lazy in coming up of a new name XD
No comments:
Post a Comment