
Hey guys!
It's been like forever since my last post eh?
Well, sorry bout that. As usual I'm busy with work, making money so I can buy more stuff to review for you guys reading my blog.
I'm amazed how my blog is still racking up some views haha!!
So for now, I have a lot of backlog of figures to review.. As in A LOT!! I'll really find time to show all of them to you guys :3
For now, Let's take a look on one of the most bad ass MS in the Gundam universe. It's none other than the Red Frame Astray from the SEED/Destiny universe.
I don't know much about the Astray stuff but I do know that it happened in the SEED/Destiny Universe haha!
So let's get it on! It's gonna be lengthy one since it's a master grade :D
Box art:


One of my favorite box arts. The Red Frame just looks bad ass and menacing at the same time. You can also see the Blue and Gold Frames in the BG. We already have the Blue Frame MG and the Gold frame amatsu has a NG 1/100 and is about to get a HG 1/144.. Maybe the MG's next :D
Lots of pics on the side showing various gimmicks. I also love how they show a picture of the MS with a straight build. Without the paints and panel linings it will still look awesome :D
Manual:


Here's the manual. Like all master grades, the front page just shows the name and the upper torso of the MS. The back page shows the MS. In older manual they show the back side because the kit comes with a cardboard insert showing the front of the MS. I wish they still do that. It's nice to collect haha!

Here's the center of the manual. Shows various info about the MS and color guide for the pilot.

Here's the parts count. It's a freakin' lot. So many tiny pieces so be careful.


Top left shows the decal and sticker guide. This is the first time I skipped applying the decals mainly because I love the clean look of the Red Frame and adding decals kinda ruins it for me. I'll keep the decal sheet for future uses :D
Top right shows info about the pilot Lowe. I hope you can read japanese XD
Bottom center shows info about the MS' various weaponry. I really hope you can read japanese XD
Runners:

This is why it has a big box.. A lot of duplicate runners. The MS is pretty symmetrical so most runners have doubles.
You'll be amazed how all of this gets hidden in that sleek MS.
Stickers/Decals:

Here's the clear stickers. A lot of big ones, so good luck in folding those to fit the parts XD

Here's the dry transfer decals.. So many XD It's like a Ver. Ka kit but of course Ver. Ka kits are more worse haha

Lastly, foil stickers. The eyes, the cameras and scope and the red ones are for the chest which isn't really needed.
Time to get on with the construction of this awesome MS.
Head part:


Some tiny parts so be careful. Also, that V-fin is very thin and fragile. I love how the black part is a separate piece. Did some panel lining to bring out the details.
Torso part:

Mostly red.. duh XD All those parts will disappear later.. It's amazing how it's comprised of a lot of intricate parts. So many points of articulation haha.
That's a link to a picture of the complete torso.. I forgot to take a picture of it with my camera.. Good thing I posted it on my instagram haha!! Instagram doesn't allow you to copy-paste pictures.. Sorry bout that.
http://instagram.com/p/Yy5QJPxsb5/
A picture of the awesome detail engraved on the torso :D

Here's the torso again with the head :D did some minor panel lining with the brown marker. It looks good with the red parts. If you have a red real touch marker, that would look good as well.
Arm/Hand parts:

So many parts again... so be careful not to lose any :D Painted the white on the hands. Makes the look complete. It's up to you if you wanna spend the time on it :3

Very sleek. If you follow me on my instagram acct. http://instagram.com/x88x/ you'll know how much trouble the left hand has given me... It's a mess.. Good thing I managed to do something about it. It's not noticeable in this pic but up-close it would be visible as hell :))
Someday I'll find the time to practice painting the pilots, I don't really bother because you don't really see them XD I also don't really display the standing versions of the pilots haha.
Waist part:
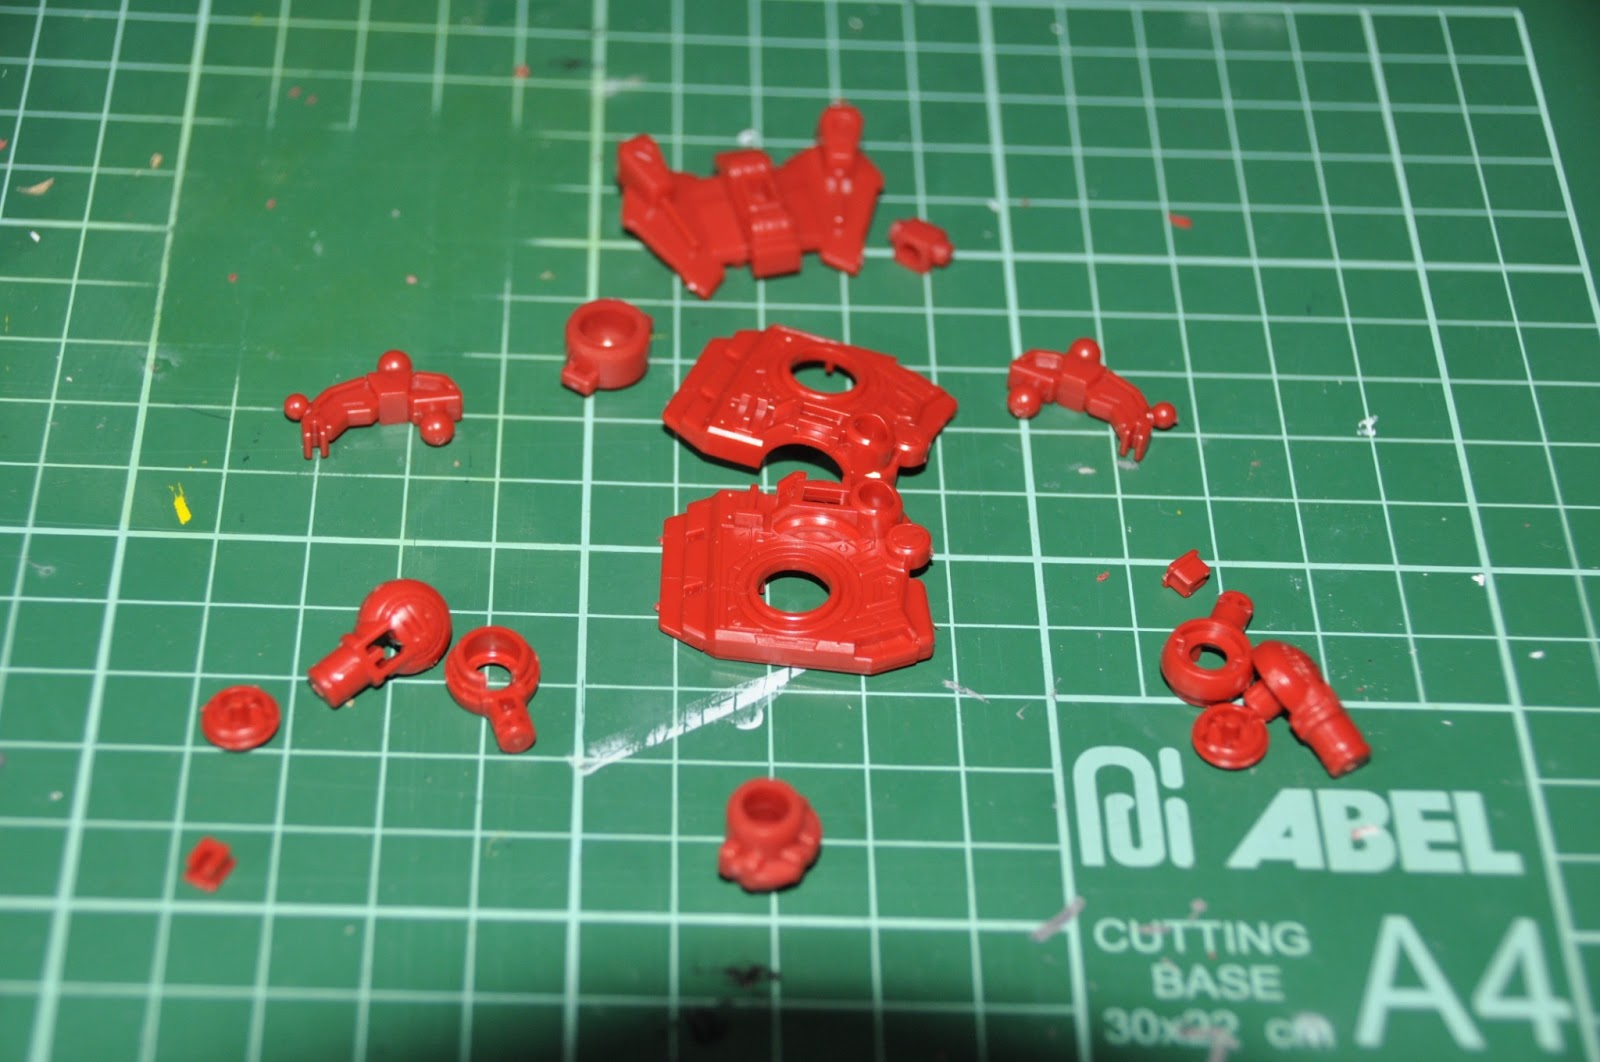

You might be getting tired of all the red :)) well this kit is not for your then. Anyway, the waist is also comprised of a lot of tiny parts so be careful as usual in cutting them from the runners.

So far so good. Doing some stretching :D

Simple assembly on the feet, just don't loose the polycaps.

I love the construction of the legs.. The way the parts move is just awesome. So many tiny parts again.

You'll wonder where'd all those parts go huh? Everything is so nicely engineered for this kit.

Here's the complete inner frame of the uh.. Red Frame :D Very sleek and thin.
Articultion:

With the armor pieces, he will have a lot of movement because there's really nothing to hinder his joints.
Time to armor him up!
Torso Armor:

A few bit and pieces here and there just to cover up some parts but it's nothing much.

The color separation is nice to break the monotonous of red frame. Did a few panel linings.
Arm armor:

Very few parts again just to bulk him up a bit.

The armor really brings out character in this MS. He's looking awesome already.
Waist armor:

Smallest skirt armor ever.

Did a few linings just to bring out some detail.

He's becoming awesomer and awesomer. LOL.
Leg armor:

The leg had the most intricate assembly. Just be patient, almost done haha! Don't forget the panel lines!
That's the link to the complete MS. One again, I only took a photo for my instagram acct. haha!! sorry bout that, but yeah, do check it out :D
Oh yeah, you also get a lot of spare parts:

Most of this are from the Blue Frame. They do fit, so up to you if you wanna use them :D
Now that the MS is done, time for the weapons! The awesome weapons.
Gerbera Straight and Tiger Pierce katanas:

Not sure which one is which but each sword has a name engraved on the handle part. Gotta love that chrome! So shiny :3 I also painted the gold parts metallic because as usual, they give you a dull gold for these things.. It's worth the trouble :D

The sheathes are simple but nicely done. You can do the panel lines on this one or not, up to you. They have a ball joint connector so you can also angle them while posing.
Posing:


Yeah.. With the 2 katanas alone, you can do a lot of bad ass poses. The MS has a nice range of movement and many points of articulation so you can do a lot of variety of poses with this guy.. I took a lot of photos but I just chose the best ones.
I love he can hold the sheathes to do more dynamic posing.
Those 2 links are pics of the MS what an added effect. I did it out of boredom :D But trust me, it looks awesome \m/
You already have an awesome pair of weapons but there's more! The Tactical Arms II Lowe Custom or TA IIL for short..
Based on my understanding, the TA IIL was given to Lowe by the Blue Frame pilot (forgot his name) in the nick of time because the Red Frame was pretty much being owned by the Gold Frame Amaterasu.. That's what I saw in a youtube video :))
Tactical Arms IIL:
The first part is the Beam torch:


Very simple assembly. Dunno if it functions like a beam rifle or maybe it's a flamethrower since it's a "torch" XD
The Beam torch will be connected to this part, the "wings":


This will make up the handle of main TA IIL.
Next up will be the blades of the TA IIL:


The blades are easy to assemble just don't forget the polycaps inside XD The Red Frame can also hold at as weapons which surprised me because I thought only the Blue Frame can do this.
But yeah, more bad ass posing :)) They're quite heavy but they lock well in the forearms. Don't forget to do the panel lining too :D
These blades will be connected to the "Main body" of the TA IIL:

This will be the connecting point for all the parts above to make up the TA IIL.

Here's the complete and default setting of the TA IIL. A huge ass sword. Of course this would be impossible to hold by the MS without any support.
Good thing they included an action base :D
Action base:


The action base given is just your ordinary Action Base 2 that you can buy separately but this one comes with a custom attachment designed for the TA IIL.
You can still change it to be used as a regular action base. It does a great job to support the TA IIL, it's just a matter of angling it to hide it in the pictures when posing.
This weapon has two connectors:

The one on the top is used for the Arrow form so it can be helped properly and the one below is a connector for the Fight form so it can angle better. Each connector is
On to the TA IIL various configurations.
The transformation from one form to another is pretty easy because they all have the same procedure:

You pull out the handle. This is done for pretty much everything to give space for the huge blades when you collapse them.

From there, you can collapse the blades and rotate the black blades in the middle by removing them and re-attaching.. They don't rotate on the peg.
From here, you can do the Arrow Form:

I think it's pretty self explanatory how I got this :D Attach the connector with the handle and you can use the effect parts for the beam shooting out.


It's pretty wide so the action base is definitely needed in posing. You can angle it in some ways just to make it dynamic. Up to you how you hide the action base in posing but it's not really that much of a big deal.
The base looks like it's part of the weapon anyway haha.
From the arrow form, you can do the Flight form:


It's pretty much the same shape as the Arrow Form with the handles and wings angled differently. You also need to change the connector so it can attach to the MS' back properly.
It's amazing how the action base is supporting all this weight. You can also you an action base 1 since those are designed for 1/100 scales.
From here, you can easily achieve the last 2 forms namely V-Form:

Just rotate it and angle the little black blades.

You'll get this effect. I'm not really sure what's the function of this one. Maybe "Stand-by" mode? This is how you see the TA IIL in most pictures of the Red Frame.
And the last form, Delta form:

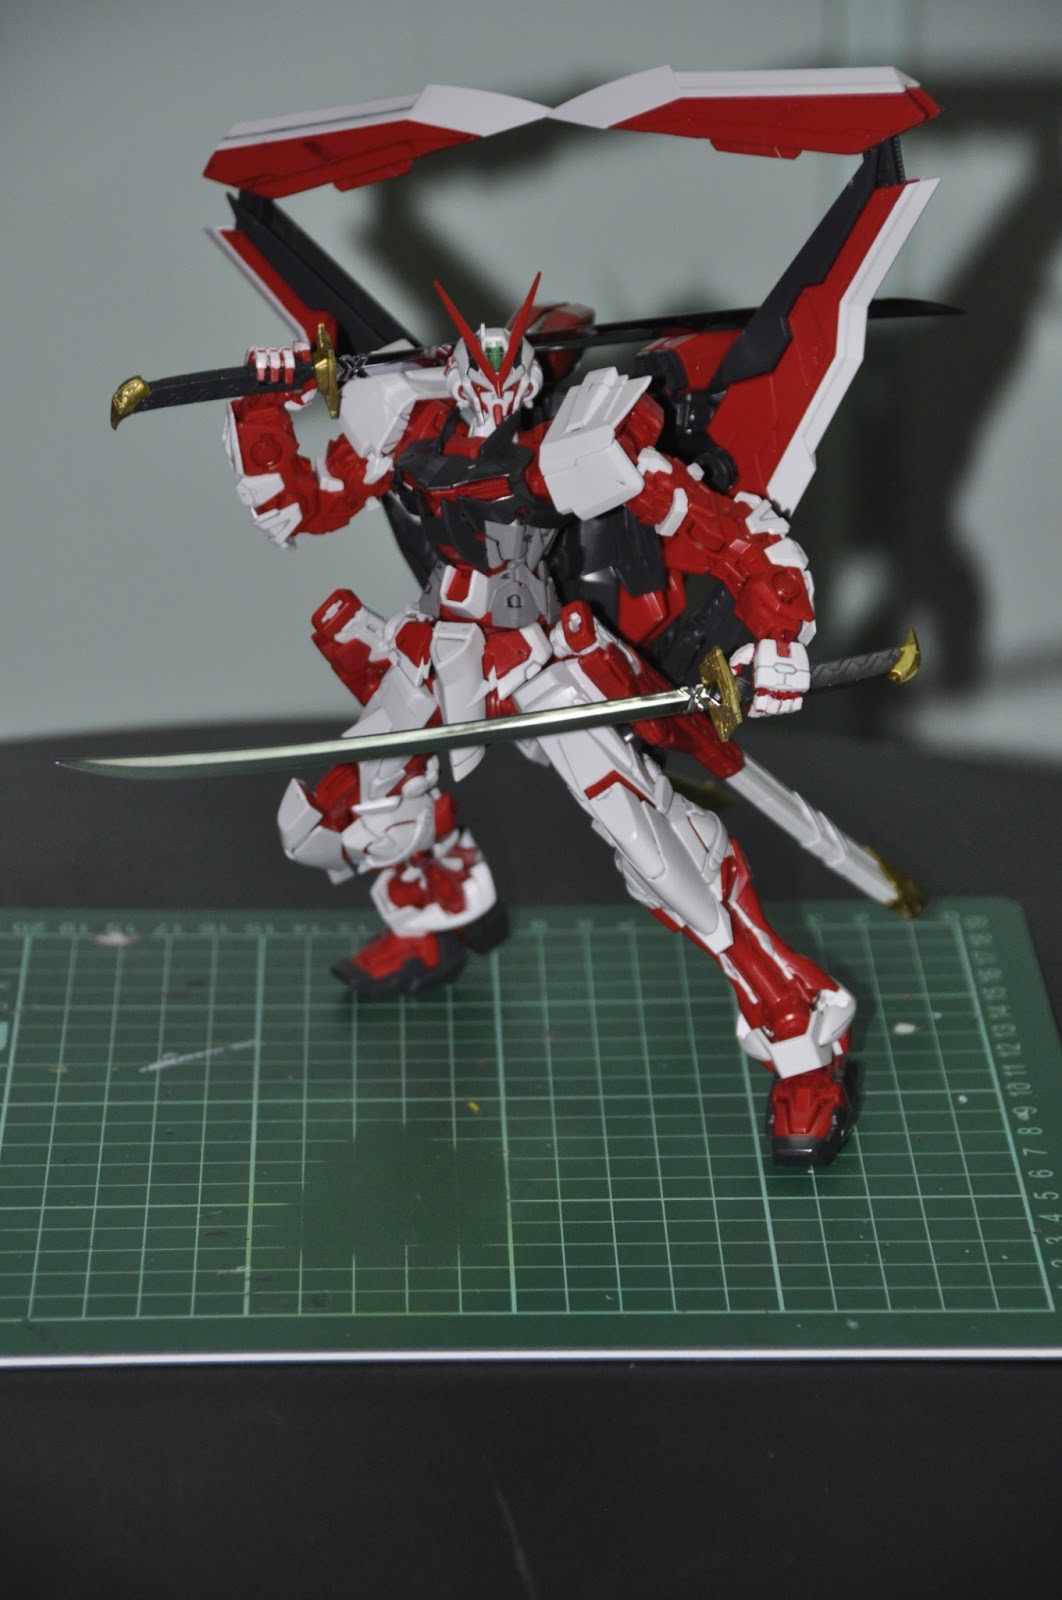

Again, pretty obvious how I got to this form. I consider this his most bad-ass configuration. It has that awesome effect to it. It does make the MS look bigger in a way.
I pose him with this form all the time. Also, I really don't know whats the function of this form other than looking awesome.
Now that the weapons are done, let's do some comparisons.
Comparison:

Here he is with my other kits. He's fairly short compared to the Impulse. Kinda surprised me. For a kit that has a lot parts, he turns out really small haha!
If you want to view more of the kits in this pic click here:
MG 1/100 Force Impulse:
HG 1/144 RX-78-2:
SD Rx-78-2:
Navigate through my blog as well if you wanna see other figures besides gunpla :D
Now for the conclusion if this thing is worth getting..
Verdict:
Detail: 10/10 - Hands down the best representation of the Red Frame. I heard a lot of people say that this beats the PG in terms of aesthetics. I agree with them. He's very sleek and that gives him a lot of decent movement and the joints are nicely done. No wonder a lot of people are buying this for customs.
It's a simple MS in design but it still manages to look menacing at the same time. I skipped the decals because I really like the simplicity of this kit. Just plain white and red is just awesome.
Articulation: 9/10 - Go nuts in posing with this guy. With this kind of build and minimal armor, he's pretty much free in moving. The legs are nicely done, so expect to do a lot of ground poses with this guy.
The arms also have a nice reach and movement. Pretty much every part of this MS body is pretty articulate. You just need an action base for aerial poses and more possibilities are achieved.
But then again, too much poseability can be a hindrance at times. The legs sometimes dislodge if you move without care so just be careful when doing wide stances. I also worry for the skirt armors because each one has individual ball joints and those things are tiny so be careful not to break them.
I also wish the feet can bend more XD but other than that everything's A-OK!
Accessories: 10/10 - Again, the MG has more stuff than the PG. Ok fine, the PG having the TA IIL would be too much anyway.. But yeah, 2 chrome plated katanas, and one big ass buster sword with various configurations? What else do you need XD
Well.. they could've included the beam rifle, beam sabers and shield but honestly.. would you really use them? XD
I mean, just with 2 katanas you're pretty sold already with this kit. The TA IIL is just one big bonus which is nice in bandai's part :3
Parts: 9/10 - My only gripe is that his hands are too fragile for some reason.. I mean I still don't get how the left got chipped making me do some modifications so the thumb would still attach XD
Conlusion: 9/10 - It's an awesome MS but of course it has a few flaws here and there. If you can overlook them, you will still owning this MS.
I bought him because of awesome he looks. I mean, where else would you get 2 katanas and a big ass sword XD
I love the Astray's in design. Very simple and robot like. I'm planning to get the Blue Frame so the Red Frame would have his partner side by side. Who know's maybe they'll do the Gold Frame Amatsu soon :D
This is an awesome addition to your collection especially if you collect MG or gunpla in general. So yeah, this guy gets a big thumbs up from me :D
Stay tuned for more of my reviews! I'll really do my best to finish more of my stuff so I can share them with you guys :D
No comments:
Post a Comment