
Here I am again presenting a kit that I painted but this time with an airbrush. So pardon the flaws of my work hahaha! I still have a lot to learn, especially in the masking department @_@
This kit has been in my backlog for years now (around 2012) and I reserved it for the time I got my own airbrush. I have another kit that has been stored for a long time and I'll probably do that next.
This MS is one of the most famous Gunpla designs back in the day when things are made simple haha!
Nowadays, we have bigger and badder monstrous MS that can probably match this but this MS is from a show where logic knows no bounds.
Let's get it on!
Boxart:


Can the box art get any more retro? It clearly screams old school. This is a NG 1/144 and I don't think they ever updated this MS. There 3rd party covnersion kits, I think.
It's pretty big for your standard NG 1/144.. Most likely because of all the thick chunky parts.
Manual:


Small manual with very text heavy content. This is the time when they don't have english translations yet like the modern kit releases so people back then really need to research what the heck those symbols mean.
As you can see at the parts count... It's not so much so prepare for a lot of solid colors.


Do you still wanna buy this kit? Hahaha! Not much color separation and pretty basic colors. That's the thing with old school kits, it will help you practice painting.
Aside from the lack of colors, theres bound to be a lot of seam lines. Also, a small sticker sheet. People who have IBO kits now probably enjoy the large sticker sheets Bandai includes in them.
Includes also the generic polycaps for joints and hand manipulators.
Assembly:


The build itself can be done in less than 30 mins.. Depends how fast you cut the parts from the tree and trim nubmarks.
So yeah, looks like one of those cheap toys being sold at chinese markets or something haha!
We're not gonna leave it like that of course!
*Oh yeah, I was building this at the time when I was about to finish my custom painted kit, hence the parts at the back*
Painting:


The usual routine. Prop them up with sticks and start with the primer. Also did some seam line removal on some areas.. Kinda needed to work on this too because the ones on the forearms still appeared. I let it pass.
Second pic shows the shade the colors I got from Armored Komodo, Neopolitan Yellow.

Here he is 90% primed and I decided to see him in his complete assembly. This was before I painted the yellow parts so it still looks plasticy here.

Here are the colors I used from Armored Komodo
Almost there.

I hand painted the eyes and the black vents because I didn't have the patience to mask those for air brush hahaha!

I hate these feet... This was the nightmare part. I redid this part more than 3 times. The one on the pic was my last attempt. Masking is a pain especially if the areas you wanna cover are small and if they have very small sections for the tape to get in.

Used some panel line accent for the black linings and hand painted the eyes and forehead camera.
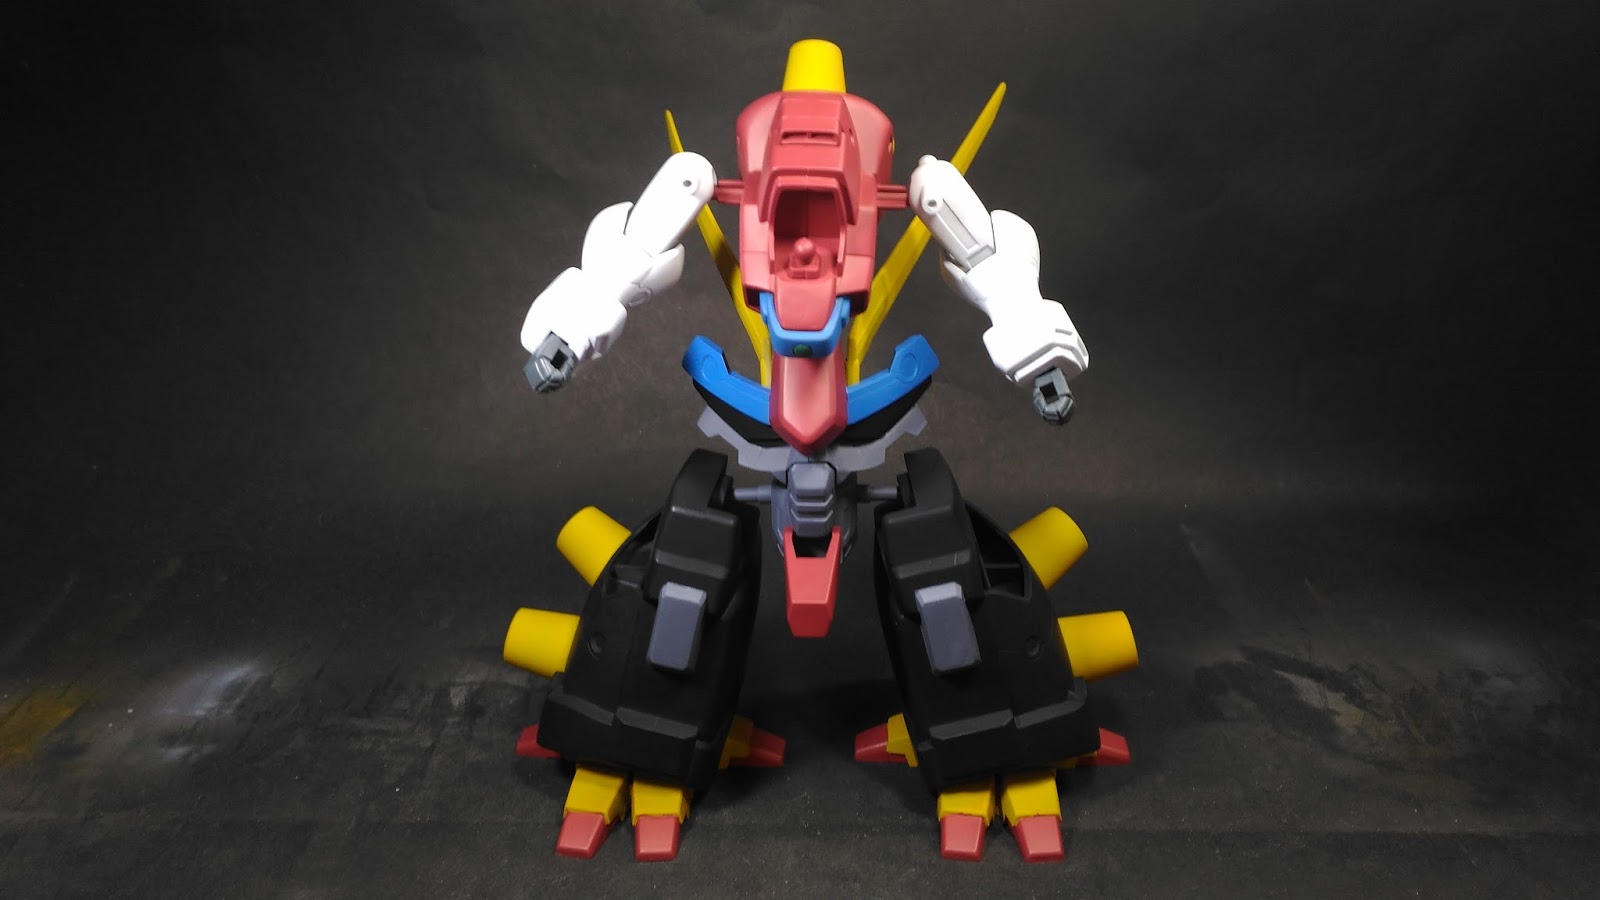
(Semi)Complete assembly:

Semi because I still need to paint the insides of the Tubes(?) other than that, I pretty much completed all the other necessary details.


Other sides of the MS. So yeah, you can see that it really needs that black color inside the tubes to give it a sense of depth.
Also, this thing is very chunky. You can probably guess how the articulation would go.
Details:


You need to do a lot of masking in this kit if you're gonna air brush this. If I handpainted this, it would probably be a different story but the pieces are so big to be hand painted.
I did hand painted the smaller areas as mentioned above. I really love how the midsection turned out, probably my favorite point of interest.
Articulation:

Simple ball joint but the legs can't really do much since it doesn't have knee articulation. It's just two big pieces with polycaps in the middle.
The arms can only bend an almost 90 deg and the mid section is fixed in place.

Butt flap/Psuedo Gundam head can move up and down. The big V-fins can rotate in place.

If you push the shoulders all the way in, the arms can't move side to side too much but you can still rotate them in place. Still limiting because of those tubes.
Arms can straighten out and hands rotate in place. It's those generic polycap hands. The head can somewhat rotate but it really has a small space to work with. Also, since the mid sections is curled, he will always look like he's looking down and it's actually hard to make him look straight. In my front view pics, I always shoot it from below to make it look like he's looking down on me haha!

See how weak the leg conenctors are? A small ball joint to support all of that weight and that will tend to drag.

You can make him sit though.

Balancing. If you moved the upper body any further it'll fall. Look's like a chicken eating its food.
Accessories:

Well... That's it. Option parts for its transformation. I hand painted the black section in the mouth guard.
Transformation:


You move the legs back, raise the butt flap and align the V-fins. Lastly, attach the mouth piece to cover the huge gaps.

Reconnect the upper body with the longer midsection so the arms won't hit the V-fins.
And voila, a Gundam on a Gundam! It does look badass in this mode though and that's pretty much it, visual appeal.
Comparisons:

Here he is next to a common MG kit, the MG 1/100 RX-78-2 Gundam 2.0. It's relatively close in terms of height but the Devil Gundam still looks thick and menacing.
Also, you can view the MG kit review here:


Here he is next to my recently finished custom painted build. Transformed, with long mid section and default appearance.
I really think the Devil Gundam should be bigger or that's probably the Final form. I forgot the stages hahaha!
You can view my custom painted kit here:
It includes some guides and tips on painting with spray cans.

Yes, I know you're gonna look for these 2 so here are my HGFC 1/144 kits, God Gundam and Shining Gundam.
Sadly, I don't have available reviews for them yet but I should probably do haha!
They look so cool together. If they only made an HGFC 1/144 Rising Gundam. I didn't really like the other suits in the show though.
Posing:

That's pretty much it hahaha! Seriously, what other possible pose can you do with kit that has this kind of articulation other than look menacing :))
I really wish the Devil Gundam had the Devil Fingers just to have some sort of variety.
Conlusion:
Details: 10/10
If there's one thing that's good about this kit, it's the details. The vents and linings, although subtle, still brings a lot of visual appeal so I really recommend to paint this kit so you can appreciate those details the included.
It's pretty close to it's line art although I kinda got confused at one point. In the finished build in the manual, the knees and gundam lower body are colored in white but in the line art, they're colored in gray.
I went with gray because it looked more menacing and too much white kinda makes it less "Evil."
Articulation: 5/10
I gave it a half score because it can technically do the basic points of articulation but don't expect too much.
It's kinda sad that the legs are just 2 big pieces of plastic. If you have the skills, modify away! Also, I wish the mid section can rotate rather than being in fixed position.
Accessories: 5/10
Well, it was a really old kit but I'm sure they could've done something about it. Possible inclusions could be a Devil Finger hand, a death army soldier and probably a few gundam heads with open mouths just like the ones it makes in the show haha!
I know those were kinda unlikely to happen but hey, you technically get a statute with moving limbs. As I said, it's an old kit, don't expect too much aside from the visual appeal.
Again, half a score because they did give you option parts to recreate his other mode.
Parts: 5/10
Half good because they did give you the necessary parts and half bad because of the lack of color separation. Again, this is an old kit, if your used to building recent HG kits then this kit will probaby shock you or give you nightmares.
Kits back in the day will really make you practice necessary builder skills. Nub mark removal, seam line removal, scribing, masking etc..
That's why I'm happy Bandai keeps re-issuing these kits so modern builders can have an idea what it was like back in the day and they still keep the cheap price point.
If you wanna practice painting, go for the old kits, they won't cost too much.
Verdict: 6/10
Long story short, it's a kit that looks awesome and badass if painted. If you're just gonna rely on the basic foil stickers, you won't give this kit justice (even though it's and evil MS.)
Personally, I got it because I love the show and it's a main antagonist suit like Char's Zaku II. I mainly collect Lead suits and their rivals.
I have yet to venture mobile armors haha! I do have the HGUC 1/144 Pyscho Gundam and you can view it here if you're interested in that:
Other than that, I got this kit also to help me improve my skills to do more than just basic snap building and detailing.
It was a good exercise and it even motivated me to do more painted kits!

Thanks to Armored Komodo's beginner friendly paints, I managed to make this build possible! Unfortunately, they don't ship internationally yet but if you're in the Philippines, do contact them if you're interested in their products:
For the Tamiya paints, I just bought them from a local hobby store.

The other tools I used in this build. In my previous build, I used Tamiya Surface primer but I find that it's not worth the price because it finishes fast so I switched to Mr. Surfacer, a product by Mr. Hobby. I love the finish it gives because it's so smooth but don't forget to thin it with lacquer thinner. Ratio is 1:2.
My trust panel line accent and Gundam marker for lining.
My favorite fine tip brushes for detailing and my chisels for loosening peg holes and trimming nubs or parts.
Lastly, another product from Mr. Hobby, Topcoat Gloss. I'm not really a fan of Gloss finishes but since this a clean build, I decided to use Gloss. If this was weathered, I will use Matte Clear instead :D
Anway, that's all I can say haha! I hope you enjoyed the review and got your interest in this kit.
Also, follow me on Twitter for my random ramblings:
https://twitter.com/GunMod88
and
Instgram for my minor Updates, BTS shots and Toy photos :
https://instagram.com/x88x
Stay tuned for more reviews and updates!

Because we have fresh cookies.
No comments:
Post a Comment